Sunday, March 21, 2010
Page by Page Photos of Household Hints
Hello to all,
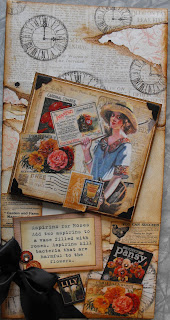
Household Hints, page by page photos are now up and can be clicked for further photo detail! This time, I was a little smarter and I put them up in reverse order so you would be able to see them in proper order!
I also updated the "Page 7 Special Pocket Page" for the torn page so that one is in the background section.
As I go through page by page, I know there are a few things missing from the kits, a piece of pattern paper here and a piece of cardstock there. I know that some have gotten in touch with me already, but for those of you who haven't, please email me.
Take Care,
Tanya
Page 10 - Inside the Large Envelope: The Details

Note: Before you cut up the Spotted Chrome Tip... Just remember to write it down first on a scrap piece of paper first. You'll be surprised how many variations you'll come up with when you try to piece the bits back together and many of them might not be the right ones! Just in case you get the words mixed up.... here is the right tip: "Say goodbye to spotted chrome by wiping with rubbing alcohol"
Thursday, March 18, 2010
Backgrounds of Household Hints - In Reverse Order
Here they are..... In Reverse Order..... The Background Boards!
As you can see from the time stamps from when I started to the last page, it has taken a a little bit of time to get them on the blog. Of course my mistakes are calculated in there too!
I am going to get the other photos up starting tomorrow, then start working on getting the text in there too. The photos are first though. The only thing I ask is when it comes to page 7 - don't glue anything down just yet as it is a Special Pocket Page. Please wait for the directions.
I will be posting the detailed finishing photos starting tomorrow.
Take Care,
Tanya
Page 7 and 8 - Special Pocket Page - Updated with Directions
***IMPORTANT***
When working on page 7 please note that the bottom half is a torn pocket.
1. Start by taking the ivory cardstock and adhere it to the chipboard with the gluestick.
2. Tear the pattern paper OVER HALFWAY (3.5") and fold the torn edge down.
3. Take a pin and poke two tiny holes thru ONE layer of the paper to aid the safety pin thru the paper (you are attaching the safety pin as an emellishment only to make it look pretty not functional!)
4. Tear off the bottom edge of the patterned paper (the least amount of paper that you can tear off!)
5. Adhere with a gluestick the right hand side of the torn pocket making sure that there is at least 3.5" of pocket and 2.5" of GLUED DOWN space.
6. Glue down the rest of the pattern paper to the chipboard with the tear outs.


Household Hints - The Background Photos!

Hi Everyone.....
I am posting the background photos first, from the beginning since that is the way that I started designing the book. I have been resizing them for a while now so bear with me as I load them up. I know that we have already finished the cover and pages one and two, but just in case you might want to re-create this project again from scratch, isn't it nice that you have the images here?
Subscribe to:
Comments (Atom)


.jpg)


.jpg)


